 To many people defining a specific color is an impossible task.
Can you tell what the color is in the primary box area to the left?
Beware, it’s color rendition can be different from the original Jpeg file image depending on your viewing monitor, which is in its own self is another issue / problem.
Guessing Brown? In a very general sense, yes, it is brown – but, brown is only a common general descriptive word for what you’re seeing – and is not, in itself a definite definition as using the word “brown” can mean something different from one person to another.
To understand what color the box area is, you need to understand how colors are defined.
There are many methodologies to define a specific color. Some of the most common methods used are R,G,B, C-M-Y-K, and L*A*B*.
R,G,B – a color process of adding the 3 Primary R,G,B Colors, Red – Green – Blue which each have a value range from 0 to 255, together to define a Non-Primary Additive Process Color
C-M-Y-K – a color process of subtracting the 3 Primary C-M-Y Colors, Cyan – Magenta – Yellow which each have a value range from 0 to 100%, from each other in combination with K, Black, to define a Non-Primary Subtractive Process Color
L*a*b (Lightness – A* axis – B* axis) – is a color-opponent space with dimension L* for Lightness having a value range from 0 to 100 and A* and B*, each having a value range from -100 to +100, for the color-opponent dimensions, based on non-linearly compressed coordinates. The L*a*b* color space includes all perceivable colors, exceeding those of the R,G,B and C-M-Y-K color models.
HSB (Hue-Saturation-Brightness) – is the most common cylindrical-coordinate representation of points in an R,G,B model. “H” having a value range from 0 to 359 degrees and “S” and “B” having a value range from 0 to 100% (this methodology is also referred to as HSV, Hue-Saturation-Value; HSL, Hue-Saturation-Lightness, HIS, Hue-Saturation-Intensity.
Color Number – a six alphanumeric designation that contains the value for all given Primary or Non-primary defined colors.
Back to the “brown” box. Using the 5 methodologies above the “brown” box area values are:
| Color Nbr. | R | G | B | L | A | B | H | S | B | C | M | Y | K | ||||
| A52A2A | 165 | 42 | 42 | 38 | 50 | 32 | 00 | 75 | 65 | 00 | 75 | 75 | 35 |
Using one or all of these values in most image-editing or photo software programs the identical color will appear.
The other opening statement, “…. (the color in the primary box area) rendition can be different from the original Jpeg file image depending on your viewing monitor ….” raises the question, how do I synchronize my monitor so that a stored image file viewed has the correct color rendition. The image file has fixed color values, while the monitor’s colors are adjustable. You want to make sure your monitor is not interpreting the colors improperly and is showing the true colors of the image file.
Most computer monitors have R,G,B adjustment controls. Consult your monitor manual to find for these controls.
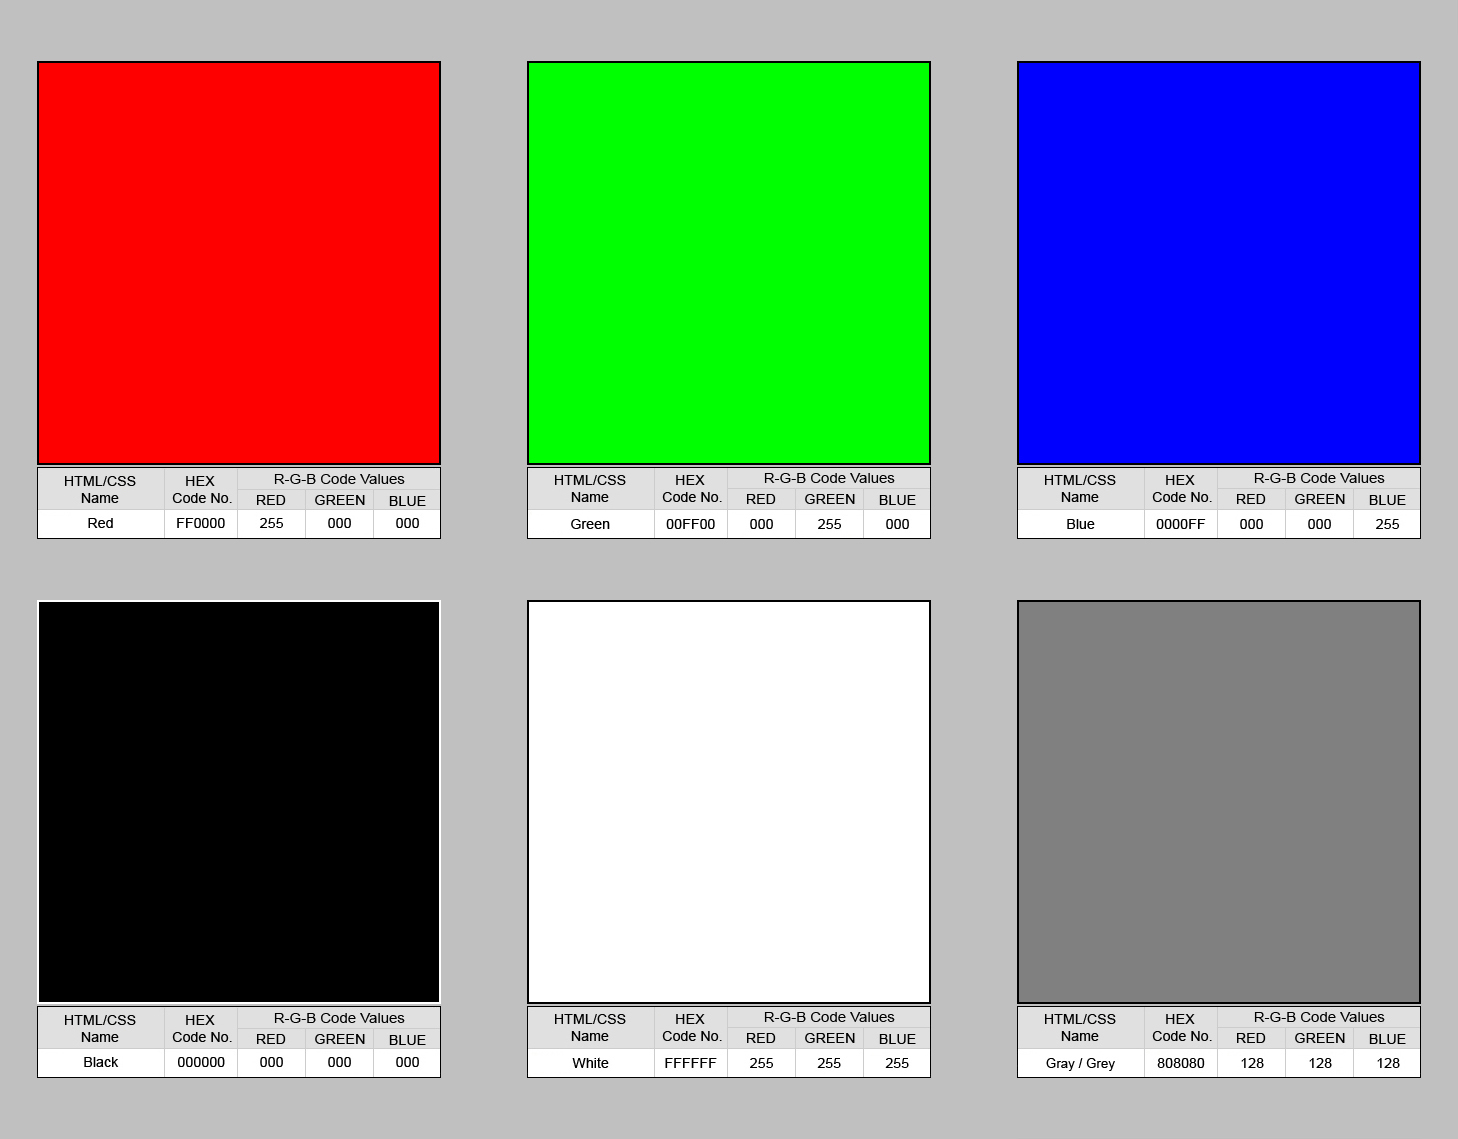
The image below has been computer generated to have absolute Red, Green, Blue primary colors as well as absolute Black, White and a mid-range Gray/Grey squares. Below each color square is its HTML/CSS Name, the Hex Code Number and the R-G-B values for each of the specific squares. Adjust your monitor so that each color is viewed properly.

Once the monitor is adjusted an image file should be seen in its true color.
To insure a live image is captured in its true color, a color calibration reference chartneed to be used to color calibration the imaging system.

Place a color calibration reference chart, such as the Applied Image IAM-9C Image Analysis Color Reference Slide, in the imaging system. Take a picture of it. View the image in an image-editing software program, such as Adobe Photoshop or Photography, Corel PaintShop, Serif Affinity Photo, Google Nik Collection, Pixir Editor, or PaintNET.
Using the Color Sampling Tool, often referred to as the “eyedropper”, in the image-editing software sample the various color patches to see if they match what is noted for the color calibration reference chart or slide. If they do not match, the imaging system’s R-G-B values will need to be re-calibrated. If the system does not have R-G-B adjustments, each recorded image will need to be adjusted in the image-editing software using one of the Image Adjustment controls (i.e. Auto-Levels, Auto-Contrast, Auto-Color, Curves, Color Balance, Brightness/Contrast, or Hue/Saturation). Once the adjustments have been determined, they can be used for all future adjustments for the additional images to be recorded. Keep in mind, this calibration will be required from recording session to recording session and each time the light levels are changed in the imaging system.
Adjusting the color balance is often times subjective, what is perceived as correct, versus objective, absolutely correct. Each person’s eyes may see colors differently. It is imperative when calibrating either the monitor or the imaging system, the colors are matched to a standard (objective) versus what appears to be correct (subjective).
