Background
Control Automation Group, LLC (or “CAG”) supports the growing demand for automation across various industries, including automotive, electronics, biomedical, medical devices, consumer products, and manufacturing.
In healthcare, the increased prevalence of diabetes is creating a growing demand for diabetes monitoring devices such as continuous glucose monitoring devices (CGMs). In turn, manufacturers focus on introducing cutting-edge technology to meet these market demands.
CAG stands ready to support manufacturers’ efforts to accelerate and advance the production of this wearable technology. This case study shares CAG’s latest success in helping a key customer bring advanced, defect-free CGM devices to market, supported by a custom checkerboard target manufactured by Applied Image.
Casebook Situation
A continuous glucose monitor (CGM) is a wearable device that tracks blood glucose (sugar) every few minutes throughout the day. The readings are relayed in real-time to a device that can be read by the patient, caregiver,
or healthcare provider, even remotely. This can be lifesaving for people who experience low glucose while sleeping.
A CGM includes a small disposable sensor worn under the skin (often on the stomach or arm). The sensor tests sugar levels every few minutes and sends this information to an attached transmitter and, usually, to a separate receiving device, such as a smartphone.
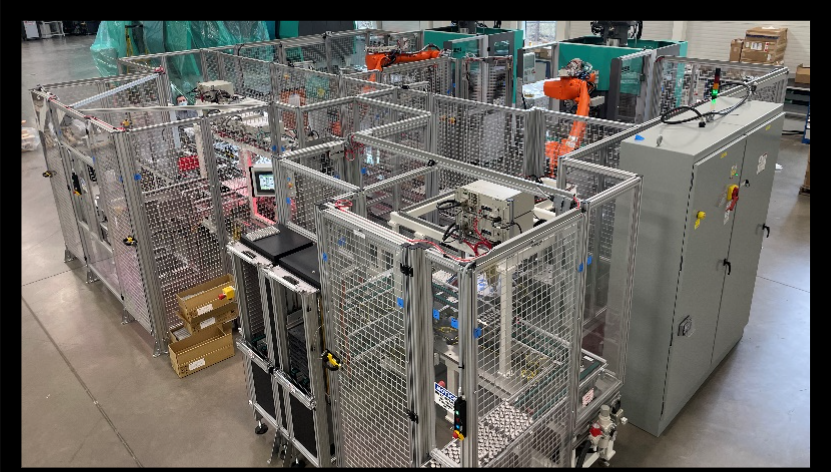
A leading industry manufacturer turned to CAG to develop a custom machine to assemble their CGM transmitter. Over two years, CAG began developing the custom machine, set to launch in 2023. The cosmetic quality was essential since the transmitter is visible on the human body. The project goals were to ensure 100% surface inspection to meet extremely tight operational and cosmetic quality standards. No surface defects (cuts, holes, scrapes, etc.)
Resolution
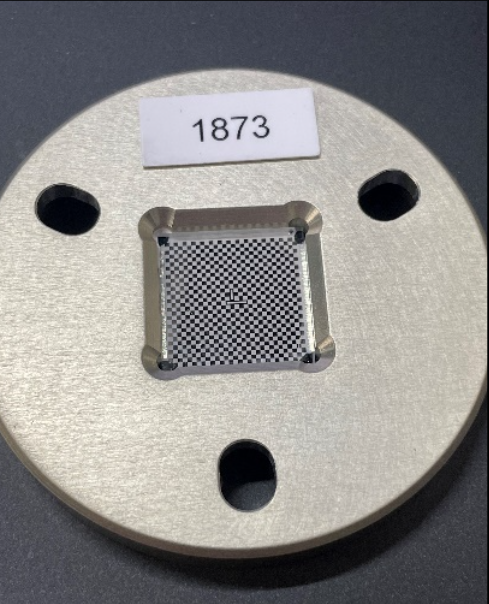
CAG’s objective was to measure the size of possible defects to ensure no spots were larger than 1 mm. Once the vision system assigns a pixel count to a defect, the customer needs that count converted into a real-world measurement. To do that, the vision system needs a calibration grid with a known size to correlate with the established tolerance. Using a checkerboard grid, CAG set the internal conversion program (X pixels = X mm) to convert pixel count from a camera to a real-world measure. Cognex is the background system used with the grid.

About CAG
CAG uses its vast experience in the custom assembly and test equipment industry to provide robotics, machine vision, electrical engineering, industrial automation, and control services.
Their automated systems improve quality, enhance safety, increase productivity, and help reduce business costs, resulting in repeat customers accounting for 80% of CAG’s
business.
Injection molded components, like a CGM transmitter, must be inspected for common molding defects, e.g., flash and short shots, flow lines, and knit lines. There is a standard of how large these defects can be, so CAG’s vision system had to measure the defect’s size in pixels which are converted to real-world measurement in millimeters. The calibration grid must be manufactured to exact specifications to correlate with the tolerance levels and nest properly within the machine.
The Cognex background program follows an algorithm to calibrate the camera to the grid and calculates the conversion based on the defect’s size.
Having that grid is crucial for the success of this quality control process. That is why CAG turned to Applied Image, Inc., to produce this component. Applied Image is a world leader in the manufacture of precision-imaged components. The custom Checkerboard Target with alternating chrome and clear glass squares made by Applied Image (the grid) met the stringent specifications CAG demanded in their relentless pursuit of quality.
Results


Why Was This Important to CAG?
The Applied Image checkerboard is a critical factor in the customer’s ability to recalibrate a camera in the future.
If the camera is moved, damaged, or needs to be replaced, the operator can put the target in, hit a button on the screen that says calibrate the vision system to the target and within seconds, it’s done; the customer can start running their production lines again. The target ensures total confidence in the camera’s accuracy. A huge benefit of working with Applied Image is that its targets are calibrated with measurements traceable to NIST.
That is essential because CAG’s end-user is a medical device company that requires certifications on all measurements. In addition to its imaging capability, Applied Image is also an ISO/IEC 17025:2017 accredited calibration laboratory and supplied the measurement data and certification documentation to share with the medical device manufacturer.
The bottom line is that the custom target supplied by Applied Image enabled CAG to have total confidence in the measurement accuracy it reports to its customers.
Would you Recommend Precision Imaged Products and Services to Others?
Mike English, Program Manager at CAG, explained that CAG had done a lot of machine vision-related work over the past 25 years.
In the past, they’ve calibrated vision cameras by physically measuring elements on the part and basing a calculation on that. CAG has been successful in using that process.
However, in this case, a medical customer wanted another way of doing it. They wanted certified measurements. That’s when Cognex suggested Applied Image.
Mr. English connected with Darren Dixon, Senior Sales Manager at Applied Image. After English explained the project goals, he was pleased to learn that Applied Image specializes in developing custom precision-imaged components.
“The Applied Image team was knowledgeable and easy to work with. The best part is that they have been down this path thousands of times; it was very new to me. They made my life easy. After explaining my technical challenges, they knew exactly what I was asking for and had an answer. I am glad we were made aware of Applied Image’s sophisticated capabilities,” stated Mr. English.
Applied Image’s unique manufacturing processes and industry expertise allow us to create custom components and standards that meet the specific needs of our customers.
